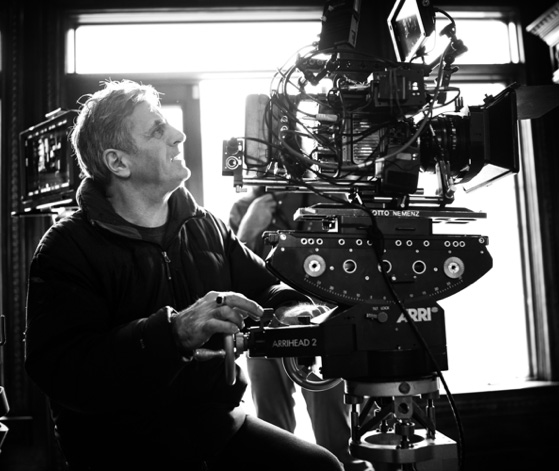
New York City at Night
“We shot for two nights in NYC. There is a myriad of color temperatures coming from many sources, traffic lights, emergency vehicles and street lights in this footage. The light in this city is magical, which gives you plenty of tonal ranges to hang your exposures off. The cinematographer who has inspired me the most, Vittorio Storaro said “cinematography is writing with light”. What we’re not doing here, is ‘just capturing’ what was there. We have to paint with light to be able to create an emotional response to the story we are telling.”
“Shooting in available low light is all about creating contrast using the different light sources around you. Shooting something flat and underexposing the image, and then trying to lift it in the color grade will immediately build noise which we want to avoid. So low light is all about modeling when working with the available light on your subject. If you just rely on the camera without finding the right light, then you can create noise that shouldn’t be there. I approach exposure much the way I approached film, using the old adage, “expose for the shadows and print for the highlights” Obviously this is not a rigid approach but a good place to start.”
“And that thinking comes back to the decisions we make about light, before we even start working out how to expose for that shot. What we do as cinematographers, is to think about how light can make drama in our shots. Drama comes from having great tonal range and contrast throughout your frame.”
“So there is a lot going on with each of these scenes. They were all well considered and planned. I wasn’t just running around NYC for two nights just shooting stuff and then trying to make it look great in DaVinci Resolve. I was choosing my locations very carefully in terms of the available light, and then making decisions about how these shots would look when graded.”
“I don’t use LUTS as part of this process. I think about the light that I can see in the location and how that will look when it is finally graded. False Color and a LUT on a monitor provides very little value to me when I am making these sorts of creative decisions. For me as a cinematographer, it’s about shooting a ‘fat neg’ that captures the tonal range I’m looking for. This gives me a well exposed image that allows a creative process in the grade, and not a ‘how can I fix this process’!”
“But to be able to do this, I need to have a mental approach to create lighting drama in my shots. A good place to start is the Zone System, developed by Ansel Adams, the legendary landscape photographer.”
“His thinking was to create a tonal range within his landscape shots. Given he shot in B&W and printed his own stuff, it all makes perfect sense for photography. I mentally use the same approach when thinking about light and where to shift my exposure. Adams had eleven zones, being pure black at 0 and pure white at 11, so I am always thinking in terms of the tonal range between having ‘blacks with some detail’ and ‘whites that won’t clip’. And so moving the mid grey point in my shots will cause the blacks to block in, or conversely the highlights to clip. Certainly, there are times where some elements in the frame that are black, or they clip, so these are things I am thinking about all of the time!”
“As a cinematographer, you can’t always rely on the camera’s dynamic range to sort these problems for you. You have to understand the contrast range of what you are shooting and where the mid grey point should actually be. And much of this depends on what you’re shooting for! Although the BMCC6K has 13 stops of dynamic range, my pro grading monitor is REC-709, which has only about 6-7 stops, and my LG OLED TV at REC 1886 which is based on Gamma 2.4 has a little more. Even film, when mastered for digital cinemas is only about 9 stops. So you are shooting outside of the dynamic range of the device you will actually see your footage on. It means those 13 stops are being squeezed into those 6-7 stops which is why BRAW film deliberately looks flat and washed out.”
“We all see around 18-20 stops with our eyes, and depending on what ISO you use, you’ll get around 13 stops in ISO 400 and 3200 out of the BMCC6K. But if you’re looking at this on a REC-709 monitor with a range of 6-7 stops, in BRAW with no viewing LUT, you’ll see a very flat image. This is simply a result of how those 13 stops are all squeezed into the REC-709 Color space. I am talking about blacks to white clip here, but this also relates to the color space, which is another conversation. Basically HD is REC-709 and UHD 4K is REC 2020 which captures a much larger range of color.”
“This is why Adams’ Zone System works for me. It’s a pre-visualization mental method where you can see a scene and then start to deconstruct the various tonal values in the shot. If there is plenty of tonal variation to work with, then you’ll get a shot with lots of drama. If there is no tonal variation, then you’ll immediately understand that this is ‘bad light’. And this is not a shot you want to waste time on.”
“A shot with ‘bad light’ can’t be lifted without creating terrible noise. So understanding what makes good tonal drama will keep you away from shooting shots with poor lighting with no tonal range. There is nothing much a colorist can do with this sort of shot, so think about how you use light before you even shoot that location. Of course if you have a truck full of lighting and grip equipment we can manage this, but if you’re shooting the available light then you need to think this way.”
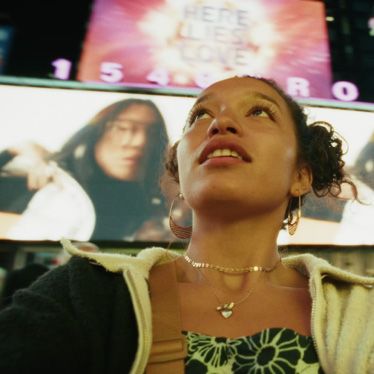
“A good example in this footage, is the scene at ‘Hell’s Kitchen at Night’. This was shot right in the middle of 45th and 9th in Manhattan. What I love most about this shot is the beautiful skin tones. Particularly that little kiss of light on the left of her face. I was thinking about how all of the crazy lights in the background were going to clip. So rather than changing my exposure, we added some fill light into the reflective shadow area around the side of her face. I didn’t use anything expensive, just a hand held LED light at 30% power to get some extra modeling on her face. Adding that small amount of light gave me the perfect tonal scale for this shot.”
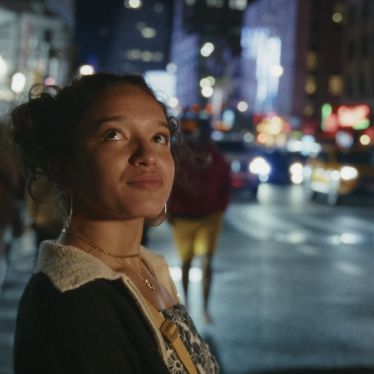
“Looking at the overexposed headlights in the background to the blackness of her hair, and then to the fall-off on the right hand side of frame - really shows how much dynamic range and information is captured in this shot. I was pleased with highlight roll off, which is very good on this camera.”
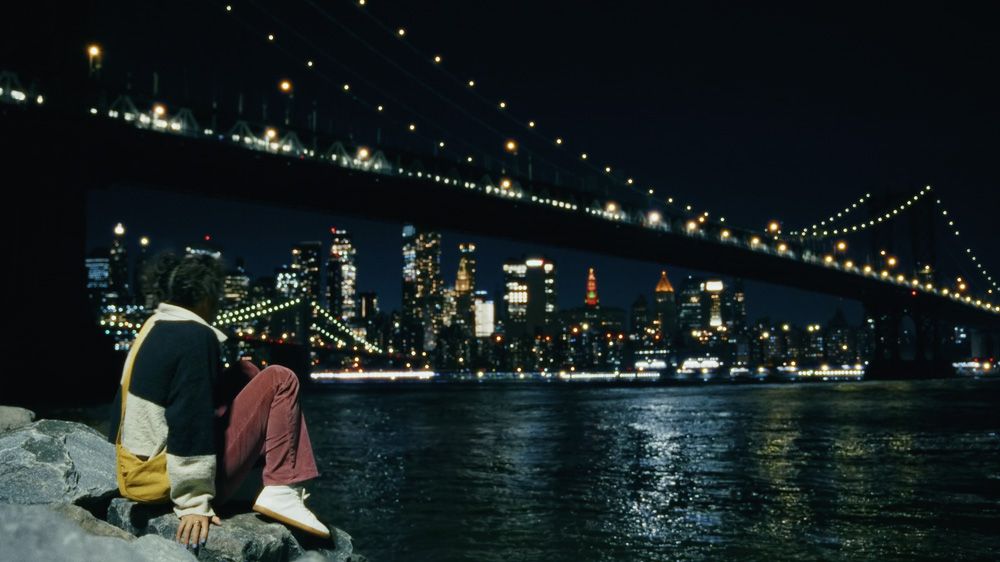
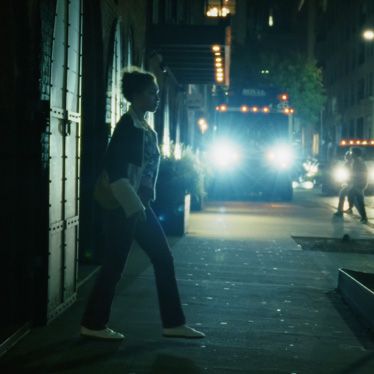
“My old-school approach of ‘shooting for the blacks and printing for the highlights’ still works today, but the application of how you do it has changed a bit! Where the girl is on the Staten Island Ferry with NYC in the background, is a good example. I needed to expose for the city lights and a small amount of night sky detail, for this shot to work. So I was shooting to get the city lights to clip but still the dark areas of the frame were underexposed. This meant that the foreground would be a little hot with some noise overall in the background. But because this was shot in BRAW at native ISO 3200, I was making the most out of the dynamic range. And so when I brought this shot into DaVinci Resolve, I could start ‘printing for the highlights’, so to speak.”
“If you’re not use to thinking about your world in T-stops like DPs do, then a good place to start is with a light meter like the Sekonic Speedmaster L-858D. I have one because it’s a digital light meter designed for digital cameras. You can set the shutter angles, frame rates and even drop-in ND filters, so you can really understand your exposure. But importantly, this meter has both a spot meter and an incident meter for reading reflective light.”
“Armed with a light meter and the Zone System in your head, Zone V is where you would want your 18% mid grey point. When you use a spot meter, it will always give a mid-grey reading to everything, whether it’s a black piece of paper or a white piece of paper. Which is why, you also need the incident meter as well, as it will give a different reading for black and white paper for example. So the incident meter will help you find the 18% grey point in your shot with more accuracy.”
“Your camera is only a recording device, whether it’s a $2,500 full frame BMCC6K or a $90,000 Arri Alexa LF with a similar size sensor! So it’s not about how much you pay for a full frame camera. The cinematographer still has to do all of the heavy lifting in terms of giving the camera its best opportunity to record a well balanced and exposed image. That’s why when budget allows, professional cinematographers have a truckload of lights roll up, even for daylight shoots. Of course this would apply to a high end production, but the point is managing and building the world with lighting that is at the core of the cinematographers craft.”
“Getting the right tonal range in your footage is critical. So when you are shooting at night using only practical lights, then you have to really be on your A-game in terms of understanding what the camera can actually grab onto. Just relying on having BRAW and two ISOs is not enough. The camera is only as good as the decisions you make in what to shoot and where you place your talent.”
“I like to have a ‘hot’ light source somewhere in the background which helps develop a decent tonal range to work with. You have to have something that will provide details in your blacks. If you can’t find a scene that has a good tonal range that you can manipulate by moving your mid grey point, then don’t shoot that scene at all!”
“Your camera’s sensor needs light from different parts of the frame to be able to shoot low noise ‘clean shots’, even more importantly, is understanding where to put the exposure. You want to avoid flat underexposed shots that when lifted in post will be noisy and unusable. All you’ll being doing is trying to compensate for ‘bad lighting’ in the first place and your only reward will be horrible noise for that decision. Painting with light is everything when it comes to digital film cameras. With available light the painting comes from from seeing the light and making good creative choices.”
“Ultimately, I think this full frame camera has beautiful highlight roll-off and it shoots really high-end quality images. When you think about this camera’s cinematography capabilities in a body this size, then that is a game changer. Having all of that for only $2,500 is seriously nuts. But then again, that pretty much sums up Blackmagic I guess.”
“The thing I was super impressed by was their decision to move to CFexpress type B. When you are doing a shoot that costs $100,000 a day, the quality of your recording media is a big deal. When I shoot on my URSA 12K, I shoot on ProGrade Digital cards. Last year I shot a 6 camera underwater commercial where the cameras were all enclosed in Hydroflex underwater housings. They were down there all day and night running in the most extreme temperatures you could imagine. We were doing an FX capture so the cameras could not be moved.”
“When I pulled my ProGrade cards from the URSAs it was seriously like juggling hot potatoes. Not only was this a good test of the URSA’s ability to perform in a nightmare scenario, but it was an acid test for the cards as well and I have used their media ever since. ProGrade now have the Cobalt range of CFexpress Type B cards which I used on the NYC shoot with the BMCC6K.”
“What’s cool about this particular CFexpress 4.0 card is they have a 1.3TB card with a read speed of 3400 MB/s and write speed of 2800 MB/s. I also use the 650GB card which has a 1700 MB/s read and 1500MB/s write speed, which is still blazingly fast. The biggest advantage of using cards this fast, is that I can use any BRAW codec including Q0 in full sensor recording Opengate, which is perfect for commercials where they will be doing VFX work. I think this shift to have CFexpress for the BMCC6K, helps to make this a serious full frame professional camera for larger productions, regardless of its physical size.”